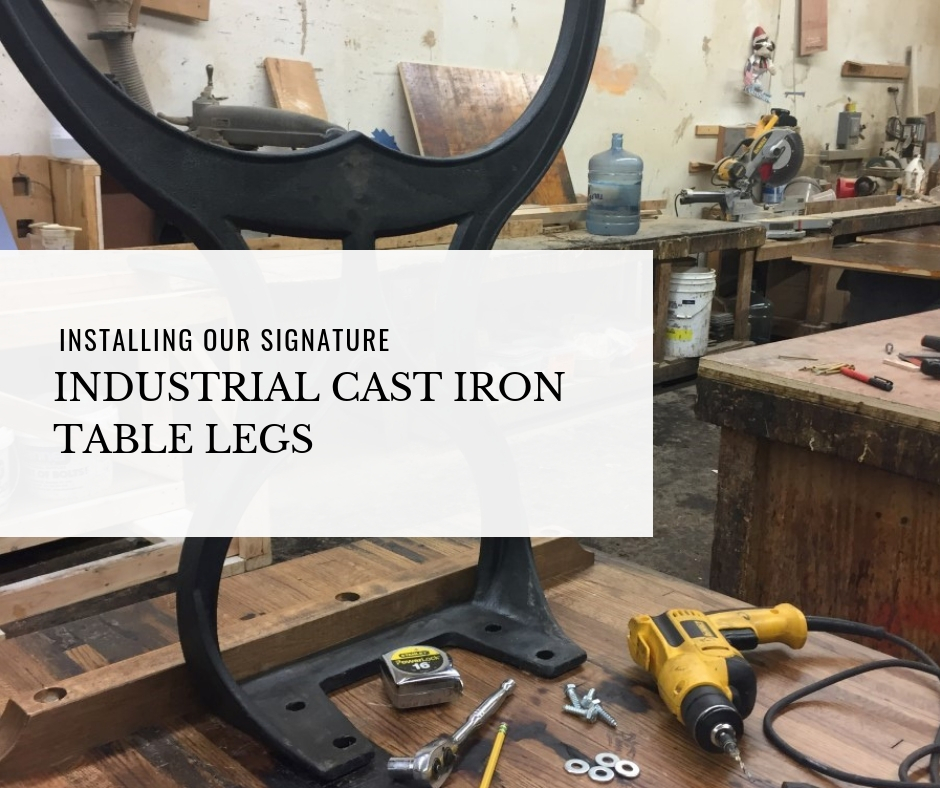
At Olde Good Things, we offer a wide range of products in our Altered Antiques line. Many of the products offered in this line, from coffee tables and benches to farm tables, come matched with our Industrial Cast Iron legs. To better help our customers, we have created this easy to follow guide to installing our Industrial Cast Iron Legs on any of our Altered Antiques products or any other project you might have.
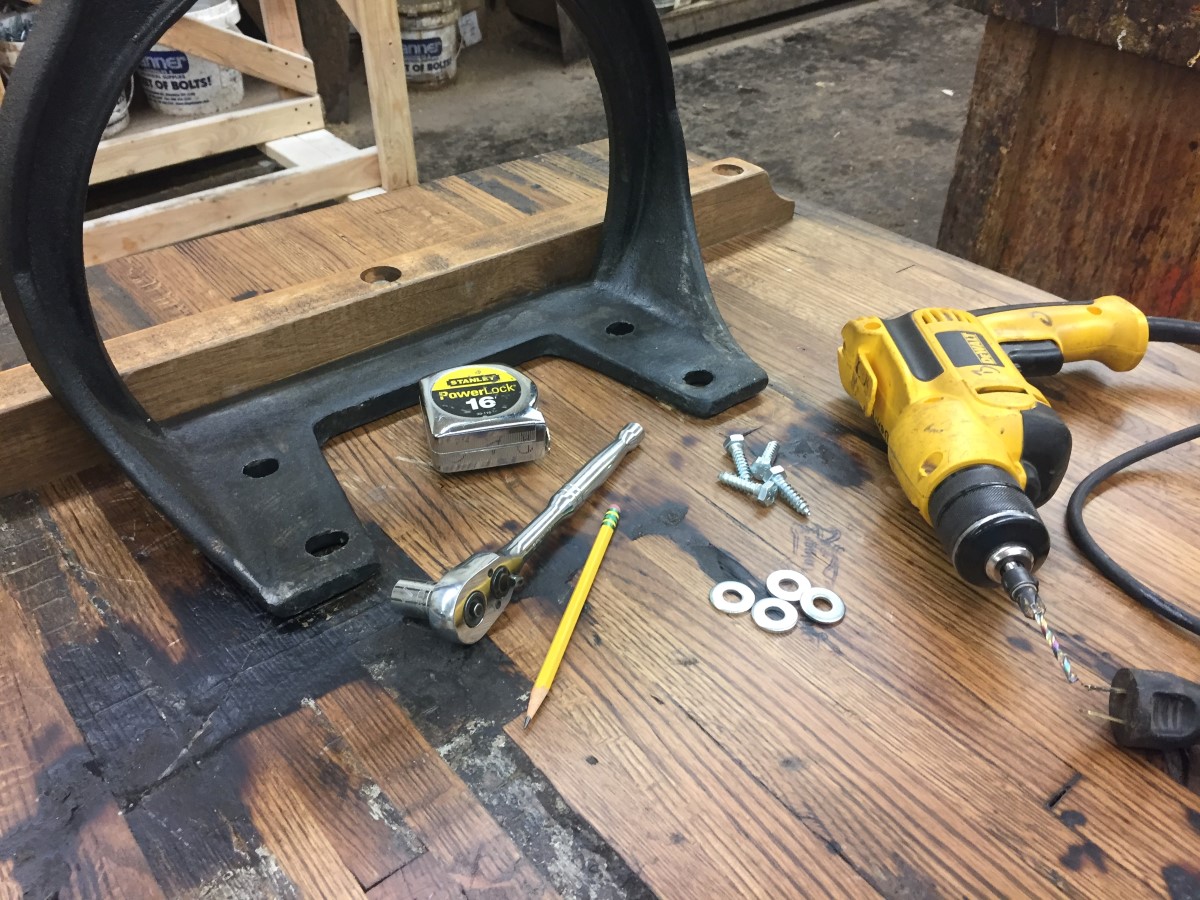
Materials and Tools You Will Need:
- 8 Hex Lag Screws
- 8 Matching Washers
- Tape Measurer
- Pencil
- Drill
- Hex Wrench
- Table Top
- Industrial Cast Iron Legs
1.
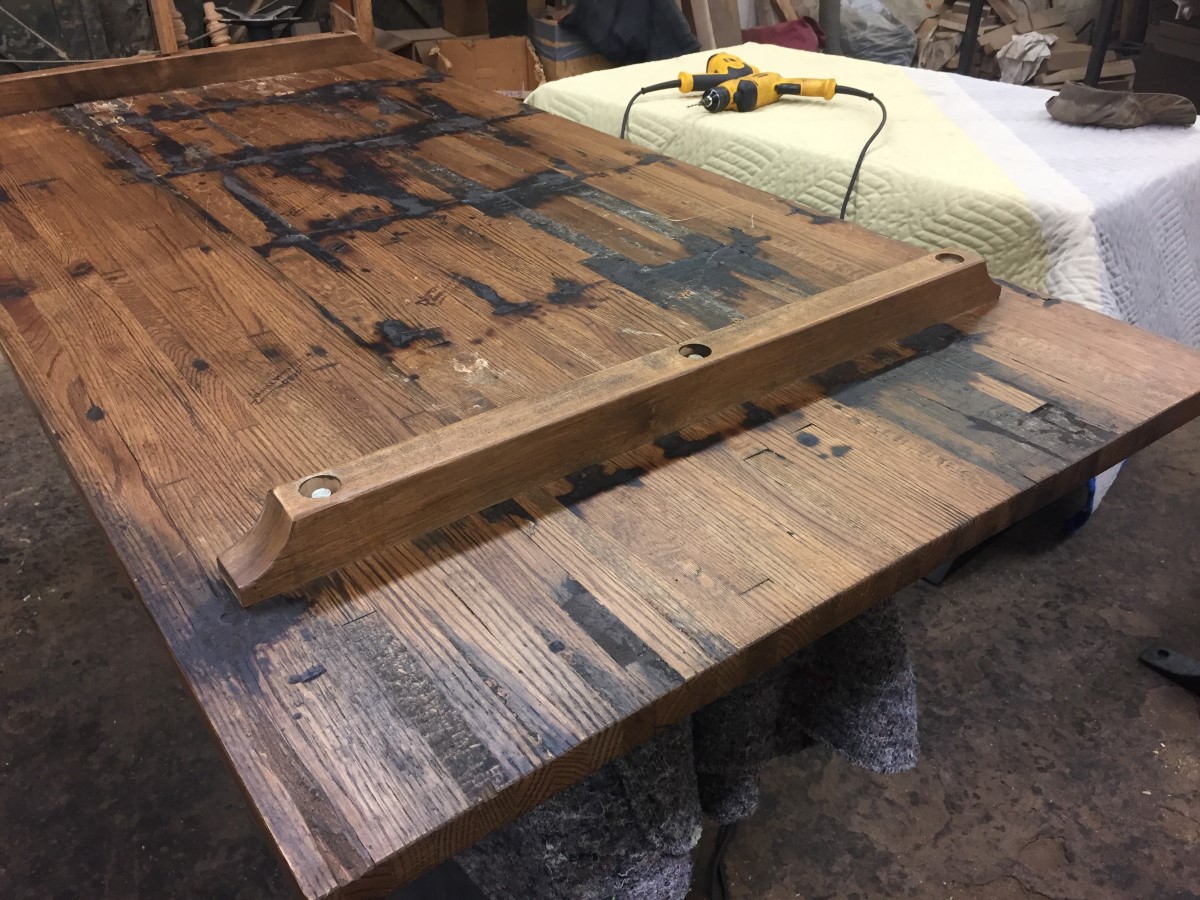
Turn the table upside-down so that the top of the table is facing the floor.
2.
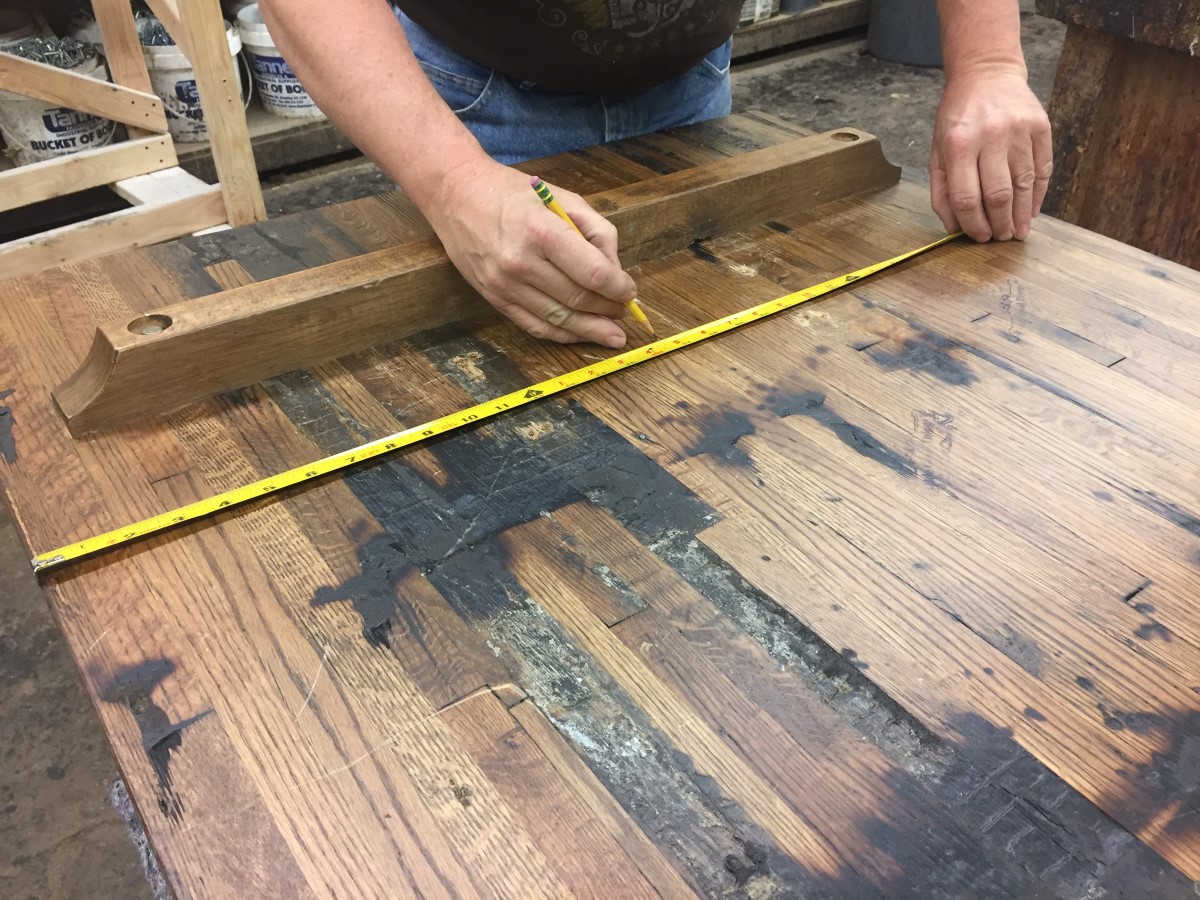
Measure the width of the table and find the center point. Mark the center point with a pencil.
3.
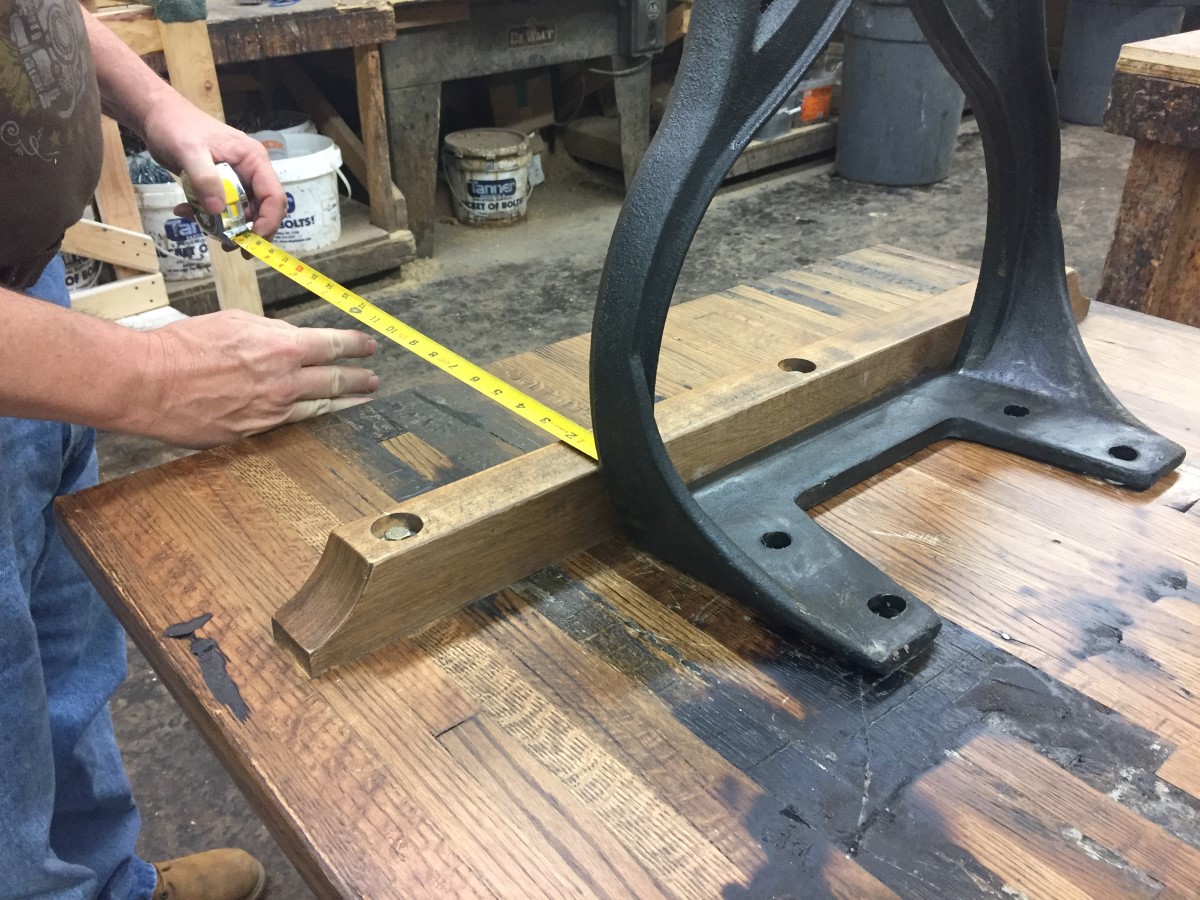
Place the legs on the table and measure in from the sides of the table to the leg mounting plate. Adjust the legs so that the measurement on both sides is equal and that the legs sit in the center of the table.

4.
Double-check the placement of the legs by measuring from the edge of the table to the face of the leg in two different places. This measurement should be the same.
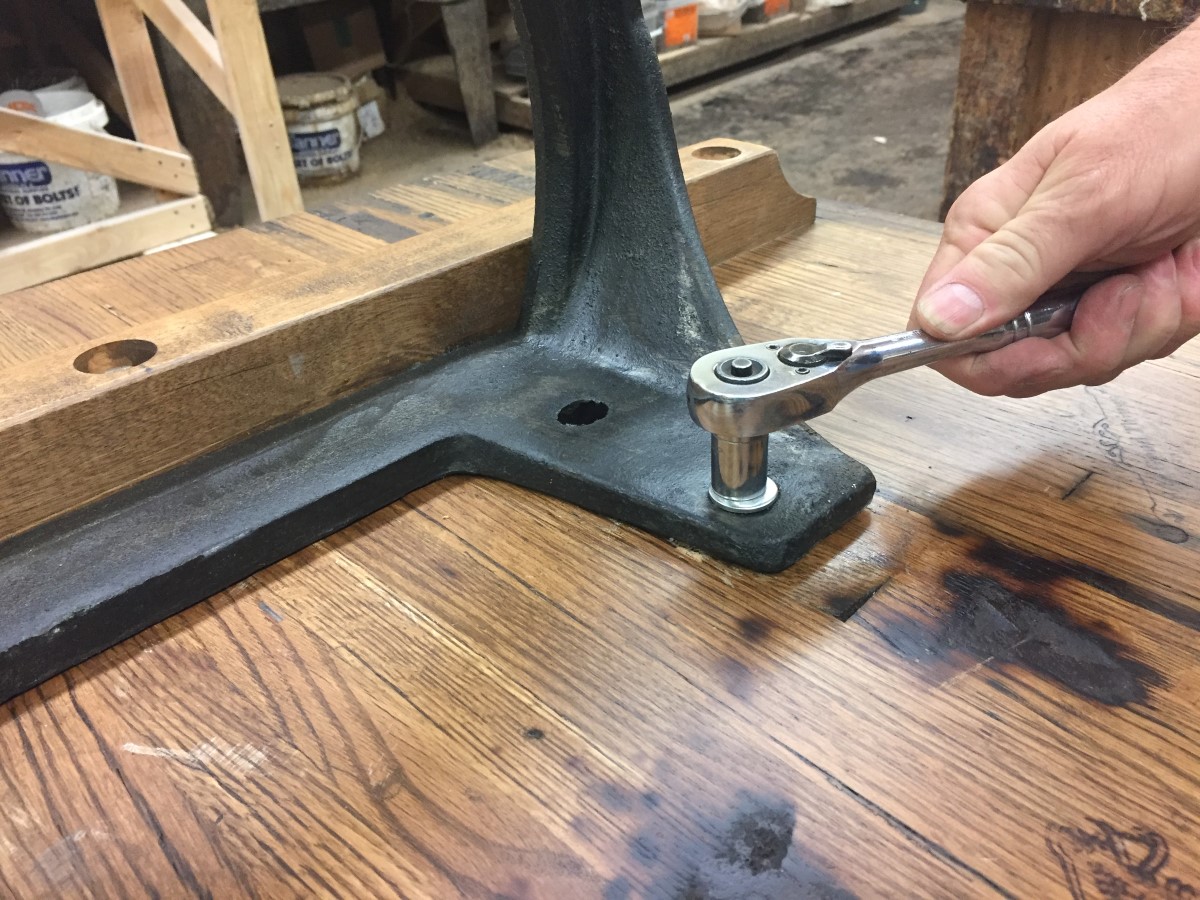
5.
Using the proper drill bit, drill a pilot hole 3/4″ deep for the hex lag screws. To help drill the proper depth, you can mark the drill bit with a piece of masking tape.

6.
Place a washer over the hole in the mounting plate of the leg, lineup the screw and use the proper size bit to screw the hex lag screw into the tabletop. Do this for all four holes and for both legs.
To help insure good leg placement on the tables, use the guide below. Find your size tabletop and use the matching leg position, starting from the end of the table inward.
4 ft. top – 8 in.
5 ft. top – 10 in.
6 ft. top – 12 in.
7 ft. top – 14 in.
8 ft. top – 15 in.
9 ft. top – 16 in.
10 ft. top – 16 in.
Tables over 10 feet in length require 3 legs for support. The third leg is installed center between the two other legs.
11 ft. top – 18 in.
12 ft. top – 18 in.
13 ft. top – 18 in.
Tips:
- Make sure that the drill bit and screws you use are not longer than the thickness of the tabletop to avoid drilling through the table.
- Please note that the mounting plate is 1″ thick. This should be take into consideration when purchasing the screws for assembly.
Shop all the the Industrial Cast Iron Table Legs we have in stock here.

